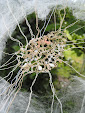
I’ve been making decisions about my lace table mats inspired by the life of Amy Atkin. If you follow this blog you’ll know I had some decisions to make about
the appearance of the mats. Well, I’ve decided to insert the lace into the
fabric of the mats rather than attach it at the side. I’m using ready made mats
and I think if I cut them in half I can use half a mat, then my lace, then a section
slightly less than a quarter of the mat. I came to that decision by folding the
mats in different arrangements and adding the lace then photographing the
result and comparing all the variations. The mats will also have the words of
the marriage service ‘for better, for worse, for richer, for poorer’
embroidered on them in a reference to Amy, and other women of her generation,
having to give up work when they married. I’ve been experimenting with fonts
for the text. I want something cursive and old fashioned so I’ve been seeing
what’s on the computer and trying a bit of writing. I’ve also been
experimenting with some embroidery stitches for the text. I’m favouring
couching at the moment having tried stem stitch, running stitch and chain
stitch. Progress is being made – watch this space!
Wednesday, 13 May 2020
Wednesday, 6 May 2020
Amy Atkin lace project
I’m getting on well with my Amy Atkin project – you’ll
remember that she was the first female machine lace designer in Nottingham. The
final piece will be four table mats with lace insertions in a reference to the
theme of The dinner party by Judy Chicago which celebrates the lives of influential
women. I’ve now made the lace for all four place mats using a needle run
technique, which is basically embroidery on machine net, similar to Limerick
lace. Although I don’t think Amy designed for needle run lace (her designs are
all for machine lace), the early Nottingham laces were based on fine embroidery
on machine net so I feel it is a suitable technique for the project. It also
means that although I’ve been inspired by her designs my four designs have been
specifically made for a different technique. One of the interesting things
about Amy’s career, and that of other women of her time, was that she had to
give up work when she married so my work will reflect that. The lace will only
be temporarily attached to the fabric of the mat so that it can be removed at a
moments notice, rather like her career, and the mats will each be embroidered with
the words of the marriage ceremony ‘for better, for worse, for richer, for
poorer’. My current preoccupation is deciding how big the mats should be, whether
the lace should be inserted or attached to the side, what font to use for the
text, and which stitch to embroider it in. A work in progress!
Wednesday, 29 April 2020
Block printing in India
Block printing was another one of the interesting crafts we
saw being made in India. Block printed fabrics were on sale in many outlets in
varying colours and degrees of complexity. Some places also had the blocks for
sale and they made a lovely display. We saw several demonstrations of printing
and in the Amber Fort we also watched a craftsman making blocks using a thread
operated drill.
The same exhibition also included a printer making a small printed
square. We saw him using three blocks with different colours, first a blue to
outline the border and the central motifs, then a turquoise to fill in some of
the areas and finally a block with a red dye to add flower shapes.
Later on in our tour we visited a workshop near Bhuj where
we printed our own fabric. It was interesting to choose complementary blocks to
print on to the cotton and try to envisage what they would look like in the
final version.
We first used a brown resist paste with one large block for our
main design motif, then used a smaller block to print highlights in black dye
that roughly fitted into the main design. There is a definite knack to block
printing! It’s important to make sure you have a thin, yet even, spread of
resist or dye on the block and then you have to apply it to the fabric with a sharp tap.
Once the printing was dry the fabric was dyed in indigo and
the resist removed. I have to say that the final result ended up looking far
better than I hoped and I’ve now hemmed my piece of fabric and will use it as a
scarf.
Wednesday, 22 April 2020
Handmade buttons Indian style
We saw some interesting variations on handmade buttons during
our travels in India. The blue ones in the picture above were made from small circles
of fabric. The material is then gathered round its edge, the centre is filled
with scraps of fabric and then pulled up to form a ball. These ones are
decorative and quite soft, but with a firmer centre they could be used as
functional buttons.
The other type of handmade buttons we saw were fashioned
from simple wrapping. During a workshop at one of the women’s cooperatives we visited
we were shown this technique for button making. Our teacher there produced a
beautifully neat button by rolling a small amount of thread into a ball and
then wrapping the remaining thread round and round the outside in a circular
motion. She finished it off by passing the thread through the centre of the
ball with a needle. The buttons in the image here were made using the same
technique but less skilfully as they look a bit lumpy!
Wednesday, 15 April 2020
Parents celebrated on lace bobbins
Many lace bobbins celebrate relationships and these include parents.
In some cases the bobbins were gifts from parents such as the bobbin on the left made by Jesse Compton which is inscribed ‘A present from my father 1836’. The
date on this one is hard to read I wasn’t sure whether it was 1886 or 1836 but
as Jesse Compton died in 1857 I’m assuming it’s the earlier date. Others, like
the two following bobbins, are simpler and just say ‘Dear father’ or ‘Dear
mother’. The next bobbin, which I think was made by Bobbin Brown of Cranfield, is
inscribed ‘My dear father’. These would have been stock bobbins held by the
bobbin makers but, the last bobbin, ‘Sarah Ions my d[ear] mother’ is a more personal
message and would have been made specially for the lacemaker who ordered it. I
love these old bobbins and the messages they convey. Do they commemorate
special events such as birthdays or were they bought as thank you gifts? I wish
I knew more about their history.
Wednesday, 8 April 2020
Indian shisha mirror work
Shisha (glass) mirror work is unique to India. According to Anne
Morrell’s book on Indian embroidery it is thought to have developed in Baluchistan
or Gujarat and may originally have incorporated naturally occurring mica rather
than mirrors. Blown glass is used now which is broken into pieces and then cut
into shapes, most often circles. However in one of the examples I bought the ‘mirrors’
seem very flexible and more like cardboard than glass (see below).
Anne describes the traditional technique for holding the mirrors
in place with two vertical and two horizontal threads forming a cross across
the face of the mirror. This cross forms the base for the top stitching which
comprises buttonhole, herringbone, or chain stitch forming a circle round the
edge of the mirror. It’s important to get the tension of the holding stitches just
right as if they are too loose the mirror falls out and if they are too tight
it’s difficult to work the circle of edge stitches.
That’s the traditional technique, however at one of the
women’s cooperatives we went to we were shown a different method. The embroiderer
made a ring of thread round her finger, worked buttonhole stitch all the way
round it to make a ring and then slip stitched it over a mirror on the base
fabric which was held in place with stitches through holes in the mirror (see
above). Embroiderers, particularly those working for a living, will always use
faster ways to produce the desired result if they can, because time is money. Whatever
the method and the materials used it is a beautiful technique that is unique to
India.
Wednesday, 1 April 2020
Indian chain stitch embroidery
Chain stitch can be made using a needle, a hook or
mechanically using the Cornely machine. Anne Morrell in her book on Indian
embroidery suggests that chain stitch was probably introduced to west Gujarat from
Baluchistan although there is also a theory that it was imported from China. Although
chain stitch is seldom used in contemporary Chinese embroidery it has been found
in textiles in ancient tombs. If you are embroidering chain stitch by hand it
is quicker to do it using a hook rather than a needle and it results in a more
regular line on the reverse of the work. The hook is similar to the ari (the
shoemaker’s awl) used to embroider leather for footwear (see my blog of 25 March),
although, because it is held differently, the handles of the two types of hook
are different.
Embroidery with a hook is generally easier if the fabric is
fixed taught in a frame. For needle work the fabric may be held in the hand or in
a frame. Anne Morrell notes that when embroidering chain stitch using a needle,
the worker generally stitches away from herself and this makes it easier to
produce small even stitches. The two pieces shown here are variations on the
same pattern produced as a sheet of square pieces approximately 10 cm in size,
which are cut up to allow the purchaser to buy as many as they want.
Subscribe to:
Posts (Atom)